


Connecting inverters to batteries is an important part of an off-grid power solution or backup power system, and the right connections ensure that the system runs efficiently. This article will explore in detail how inverters and batteries work together, how to connect them correctly, and how to avoid common connection errors to ensure optimal system performance.
How do inverters and batteries work together?
To know how to properly connect an inverter and a battery, it is important to understand the principles and mechanisms by which the two devices work together.
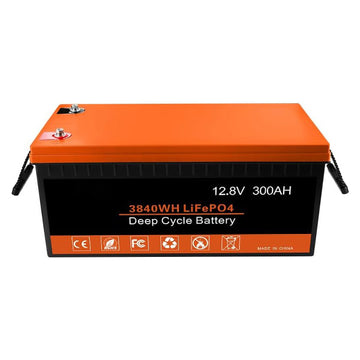
The core function of a battery is to store DC electrical energy. Whether it's electricity generated by solar panels or energy charged from the grid, the battery stores it in DC form. The electronic devices we use in our daily lives require DC power to keep them running, and that's where inverters come in handy.
Since batteries cannot output AC power directly, inverters take on the role of a bridge between DC and AC power. When we can't connect to the grid or experience an unexpected power outage, inverters take the DC power stored in batteries and process it through high-frequency switching components to form stable AC power, making it suitable for home and commercial appliances. High-quality inverters monitor the load power and automatically cut off the output when the limit is exceeded to avoid battery over-discharge.

Why proper battery-to-inverter connections are critical
Connecting the battery to the inverter may seem simple, but subtle mistakes can have disastrous consequences for the efficiency of the system.
Ensuring efficient power transmission
The correct connection between the battery and the inverter ensures efficient power transmission. The efficiency of power transmission directly determines the operating costs and energy utilization of the system. With the correct connection, the energy stored in the battery can be smoothly transferred to the inverter and converted into stable AC power for the power supply equipment, maximizing system efficiency. Improper connections, such as a battery voltage that does not match the inverter's input requirements, may result in less efficient power transfer.
Preventing battery overcharging and overdischarging
A proper connection between the battery and the inverter helps prevent overcharging and overdischarging. Improper connection between the inverter and the battery may result in the inverter failing to accurately read the battery's voltage information, which may cause the battery to be overcharged or over-discharged. Overcharging may trigger thermal runaway, fluid leakage, or even explosion, while over-discharging may cause the battery capacity to drop or even lead to battery damage.
Preventing equipment damage
Proper battery and inverter connections can prevent equipment damage due to wiring errors or polarity problems. For example, incorrectly connecting the positive and negative terminals of the batteries may cause the inverter to fail to work properly or even burn out the inverter's circuit system. Mismatched battery voltages may also damage the inverter and cause the entire system to fail. Therefore, ensuring that the battery and inverter are connected correctly can effectively avoid this risk and reduce the cost of equipment repair and replacement.
Extends system life
Connecting batteries and inverters correctly not only ensures efficient and safe operation of the system but also extends the life of the entire system. Incorrect connection between the inverter and the battery may lead to overcurrent, overvoltage, and other problems, accelerating the aging or damage of the equipment. This negative effect can be avoided by standardizing the connection, thus reducing the frequency of equipment maintenance and enhancing the durability of the system.
Connecting a battery to an inverter: step by step
Take care to operate in a dry, well-ventilated environment (to avoid the buildup of hydrogen gas released from the batteries) and wear insulated gloves and goggles.
1. Selecting the Right Inverter and Batteries
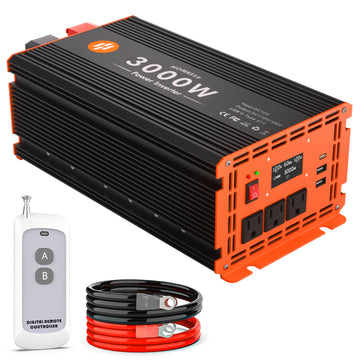
The first thing to do before you start making connections is to make sure that the inverter and batteries are compatible with each other. The inverter and batteries must match in terms of voltage, capacity, and power output.
If you are using a 12V battery, then the input voltage of the inverter must match the battery voltage. If the specifications of the battery and the inverter do not match, the system will not operate stably and may even damage the equipment.

In addition, choose the right inverter power and battery capacity for your home or commercial needs. If the battery capacity is too small, it may not be able to store enough power. The power of the inverter should also be selected according to the power demand to avoid too much or too little power, leading to waste or overload.
Learn More: How to Choose the Best Inverter for You?
2. Prepare appropriate cables and connectors
Select the appropriate wire thickness and voltage rating according to the specifications of the inverter and battery. High-power applications require the use of large gauge cables to prevent overheating and voltage drops and to ensure safety when connecting the inverter to the battery.
3. Connecting the Battery and Inverter
First, disconnect all power sources to ensure that all equipment is in a de-energized state. This prevents electrical shock or short circuits during system operation.
Then, use cables to connect the positive terminal of the battery to the positive input of the inverter and the negative terminal to the negative input of the inverter. If you are unsure of the polarity of the batteries, you can refer to the markings on the batteries or use a multimeter to measure the voltage polarity of the batteries. Reversing polarity can cause irreversible damage to the system and is a safety hazard.
The connection between the battery and the inverter should be made using standardized connectors, ensuring that the joints are secure and not loose. In addition, make sure that the cables are securely connected to avoid looseness or poor contact that could lead to inefficiencies.
Handle the cables carefully during the wiring process to avoid stretching or twisting of the cables, which may affect the power transmission. If more than one battery is connected together, make sure that the parallel or series connection meets the input requirements of the inverter, and keep the voltage and capacity of the battery pack consistent.
4. Secure the batteries and inverter
Both components should be securely mounted to prevent vibration, which can cause wear and tear over time. In addition, check the grounding system of the inverter to ensure that it is well grounded. Grounding is an important step in ensuring the safety of the system, preventing safety issues such as electrocution or fire caused by electrical faults.
Testing and maintenance
Performing a System Test
Once connected and set up, start the inverter and perform a system test. Make sure the inverter can start normally, observe the display, and confirm that the battery level is normal. Check that the output voltage of the inverter matches the specifications of the batteries.
Next, test the power output and load capacity of the inverter. Connect household appliances to the inverter and gradually increase the load. Closely monitor the system to ensure that the inverter can handle the required power requirements without overheating or malfunctioning.
Testing will confirm that the system is operating correctly, and if abnormalities are detected, you will need to check that the wiring is correct and that the condition of the inverter and batteries is as expected.
Periodic inspection and maintenance
After the system has been put into operation, it is still necessary to periodically check the connections between the batteries and the inverter to ensure that the connections are not loose or damaged. Regularly check the voltage and state of charge of the batteries to ensure that they are in a healthy state and carry out any necessary maintenance depending on the type of battery.
Inverters also need to be cleaned and inspected regularly to ensure good heat dissipation and to avoid dust or dirt from affecting the proper functioning of the inverter. Regular maintenance can help detect problems in advance and extend the life of your equipment.
FAQ
Q: Do I connect the positive or negative terminal of the battery to the inverter first?
A: Connect the positive terminal first (red wire clip to the “+” side of the battery) and then the negative terminal (black wire clip to the “-” side of the battery). This keeps the sparks further away from the battery and avoids igniting any explosive gases that may be present.
Q: Which wire is used to connect the inverter to the batteries?
A: The thickness of the cable depends on the power level. A 4 AWG cable is commonly used for inverters smaller than 1500W, and a 2 AWG or thicker cable is commonly used for medium to high power inverters (2000-3000W). It is recommended to use multi-stranded copper core cables.
Q: Do I need a fuse between the battery and the inverter?
A: Yes, it is recommended to install a fuse or DC circuit breaker between the batteries and the inverter to prevent short-circuit or over-current damage to the cables and equipment.
Q: How do I connect the inverter to a non-sparking battery?
A: First, turn off the power of the inverter, then “connect the positive terminal first, then the negative terminal” - first fasten the red wire clamp to the “+” terminal of the battery, then connect the black wire clamp to the “-” terminal of the battery. “-” end, so that the possible spark control in the location away from the battery gas gathering area to reduce the risk of explosion.
Secondly, connect a 10 Ω~25 Ω high power resistor in parallel with the positive wire, first let the inverter internal capacitor slowly charge by small current (about a few seconds), wait until the capacitor is full, then remove the resistor and complete the main wire connection, which can eliminate the sparks.


