


An inverter is a device that converts direct current (DC) from your batteries to alternating current (AC), allowing you to power your appliances, tools, and electronics on the move. This is particularly useful for travelers, campers, or anyone who needs to use their car battery to power devices that require AC power, such as laptops, fridges, or even small air conditioners.
In this guide, we'll take you through the process of connecting an inverter to your car battery so you can enjoy reliable power whenever and wherever you need it.
Why connect an inverter to a car battery?
The main purpose of connecting an inverter to a car battery is to get a steady source of power from the car battery to support devices and appliances that require AC power. As most car batteries are DC batteries and home or commercial appliances usually use AC power, the inverter converts the DC power from the car battery to AC power. This provides a convenient solution for drivers, travelers, campers, etc. to use appliances and equipment without a regular power source.
When would you connect an inverter to a car battery?
1. Road trips and camping:
On long drives, camping trips, or outdoor adventures, your vehicle's battery and inverter can power a variety of devices. For example, you can charge and run a small fridge, laptop, TV, mobile phone, or other essential appliances. An inverter ensures that you can use these devices in environments where you don't have a regular power source.
2. Backup power for emergencies:
In an emergency such as a disaster or power outage, inverters, and car batteries provide a fast and effective backup power source. You can use the inverter to power essential equipment (such as lights, communications, or first aid equipment) until power is restored or other backup power is available.
3. Emergency vehicle repair or maintenance:
The inverter can provide power for repair tools, diagnostic equipment, or other emergency equipment in the event of a mechanical problem on the road or when the vehicle needs temporary electrical support. This is particularly useful for commercial vehicles and recreational vehicles (RVs) that travel long distances.
Benefits of connecting an inverter to a car battery
- Convenient mobile power:
Inverters allow you to easily power a variety of electrical devices in the car or outdoors, without having to rely on a fixed electrical system.
- No need to rely on external power sources:
Where mains power is unavailable, an inverter allows your vehicle or battery system to provide the necessary power, especially for camping, road trips, and other occasions.
- Improved emergency response:
In the event of a sudden power outage or natural disaster, a vehicle inverter can help you maintain basic power and keep emergency communications or medical equipment running.
- Save fuel and money:
Using the car battery to power the inverter instead of starting the engine avoids prolonged fuel consumption and reduces unnecessary energy waste by running small appliances on a smaller car battery.
The importance of the right connections
The correct connection of the inverter to the vehicle battery is essential for the safe and efficient operation of the system. A poor or loose connection can lead to overcharging or damage to the battery and even cause a fire. Improper connections can also lead to inefficiency and the inverter may not be able to draw enough power from the battery, leading to system instability. Correct connections not only prevent the battery from being over-discharged or damaged but also prevent the internal components of the inverter from overheating or malfunctioning.
In addition, the life of the inverter, onboard battery, and electrical equipment depends on the stability of the power system. The correct connection can effectively prevent problems such as overcurrent, overvoltage, and overheating, thus extending the life of all equipment and avoiding frequent repairs and replacements.
Necessary tools when connecting an inverter to a car battery
To complete the installation process safely and smoothly, the necessary tools must be prepared in advance:
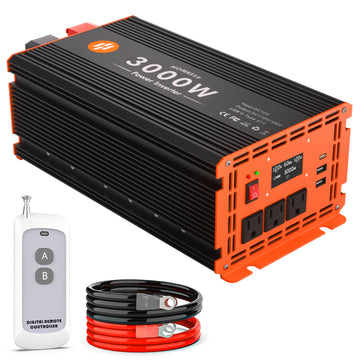
Inverters: Make sure the inverter's power rating, starting power and waveform meet the needs of the equipment you need.
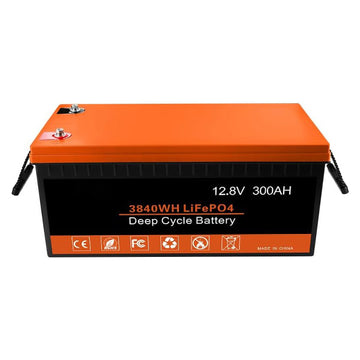
Batteries: Ensure that the batteries are sufficiently charged; a common onboard battery is a 12V battery, but some systems may use a 24V battery.
Cables and connections: Select the correct cable size to handle the expected current. Ensure that the cable length is suitable for connecting the inverter to the battery, but avoid excessive lengths to minimize voltage loss.
For example, large gauge cables are required for high power applications to prevent overheating and voltage drops, and to ensure safety when working out how to connect the inverter to the battery.
Battery clamps and connectors: Battery clamps are used to securely connect cables to the positive and negative terminals of the battery. Connectors ensure that current flows smoothly without loosening or making poor contact.
Fuses or circuit breakers: Fuses or circuit breakers are safety devices that protect the electrical system from overcurrent and short-circuit damage. Select a fuse or circuit breaker that is suitable for the maximum current of the inverter, which is usually slightly higher in current value than the rated power of the inverter.
Note: The fuse should be installed on the positive pole of the battery to break the circuit in case of overload or short circuit.
Multimeter: Used to test the voltage at the inverter and battery terminals to confirm that the connections are correct and the system is working properly.
Cable ties or cable management tools: Used to organize cables and prevent them from becoming loose or coming into contact with other components. Keeping cables tidy reduces the risk of chafing and damage.
Selection note: Ensure that the cable ties or management tools do not put undue strain on the cables, and select materials that are resistant to heat and abrasion.
Vehicle power panel (optional): If multiple sockets are required, an on-board power panel can provide additional sockets for easy powering of multiple devices at the same time. Select a panel that is suitable for installation in a vehicle, and ensure that it is compatible with the inverter and that it has the necessary protection (e.g. overload protection).
Safety precautions when connecting inverters to car batteries
When connecting an inverter to a car battery, safety is paramount to prevent accidents and ensure that the system operates efficiently. The following are basic safety precautions to follow during this process:
Turn off the inverter and disconnect the batteries
Always turn off the drive and disconnect all power before making any connections. This will prevent electric shock or short circuits while working on the system. This is the first step in safely connecting the inverter to the batteries.
Use properly rated components
Make sure the inverter, batteries, and cables are all rated for the required voltage and current. Improperly rated components can cause overheating, electrical malfunction, and even fire.
Check for clean connections
Make sure the battery terminals and inverter connections are free of dirt, corrosion, or oxidation. Dirty or corroded contacts can lead to poor connections, resulting in inefficiency or even system failure.
Avoid overloading
Double-check that the power rating of the inverter does not exceed the output capacity of the batteries. Overloading any component can result in overheating or damage, which can shorten the life of the inverter. A fuse or circuit breaker should be installed when connecting the inverter to the batteries.
Check the polarity
Make sure the positive and negative terminals of the battery match the corresponding terminals on the inverter. Reverse polarity can cause irreversible damage to the system and is a safety hazard.
Work in a well-ventilated area
Always work in a well-ventilated area, especially when working with lead-acid batteries, which can release harmful gases during the charging process. This is especially important in confined or enclosed spaces.
Secure the inverter
Vehicle inverters should be securely mounted to prevent vibration, which can cause wear and tear over time. Proper stabilization will ensure the longevity and safety of your equipment as you learn how to connect the inverter to the battery.
How to connect an inverter to a car battery
1. Determine the connection location
The inverter should be mounted close to the battery to minimize cable length and reduce voltage drop. Make sure the inverter is mounted in a well-ventilated location to prevent overheating.
2. Preparing the battery
Turn off the vehicle's engine and leave the battery in an unpowered state. Clean the battery terminals to ensure there is no oxide or dirt.
3. Connecting the inverter to the battery
- Positive connection: Connect the red positive cable to the "+" terminal of the inverter and install a fuse or circuit breaker on the cable near the battery end. Then connect the other end of the positive cable to the positive pole of the battery.
- Negative connection: Connect the black negative wire to the "-" terminal on the inverter. Then connect the other end of the negative cable to the negative pole of the battery.
- Tighten connections: Use a wrench or screwdriver to tighten all connections to ensure a steady current without overtightening.
4. Checking and testing
- Use a voltmeter to check the connections: Measure the voltage at the inverter input to make sure it matches the battery voltage.
- Turn on the inverter's power switch: Verify that the inverter starts up normally and that there are no alarms or abnormal indications.
- Connect the load: Connect a small power load (such as a light bulb) to test the inverter's operating status. Gradually increase the load after confirming that the drive is receiving normal power.


